You planned your weekend. Gathered your supplies. Cleared the furniture. And now you’re staring at a gray, drizzly day outside wondering if you should wait—or if hiring interior house painters would save you from this headache altogether. Here’s the truth most people don’t realize: the ideal conditions for interior painting have less to do with what’s happening outside and more to do with what’s happening inside your walls.
That paint can sitting in your garage? It has opinions about temperature and moisture. Ignore them, and you’ll end up with bubbles, peeling, or a finish that looks like it was applied by a toddler with a sponge. Pay attention, and your walls will look smooth and professional for years.
Key Takeaways:
- Paint performs best when indoor temperatures stay between 50°F and 85°F.
- Indoor humidity should be below 50% for proper drying and adhesion.
- Cold weather painting is possible indoors if you control room temperature.
- Running your HVAC system helps regulate both temperature and humidity.
- Drying time doubles or triples when conditions aren’t right.
Paint isn’t just colored liquid. It’s a carefully engineered mixture of pigments, binders, and solvents designed to work within specific temperature ranges. When those ranges get ignored, chemistry goes sideways.
Most latex paints need temperatures above 50°F to cure properly. Below that threshold, the paint’s binders can’t form a continuous film. What you get instead is a weak, powdery surface that will chip and peel within months.
On the hot end, temperatures above 85°F cause paint to dry too fast. The surface skins over before the layers underneath have time to level out. This creates visible brush marks, lap marks, and an uneven sheen that screams “amateur job.”
The sweet spot sits right around 70°F. At this temperature, paint flows smoothly off the brush or roller, self-levels as it dries, and cures into a durable finish. Most manufacturers print this recommendation somewhere on the can—though usually in font size meant for ants.
The Hidden Problem of Humidity
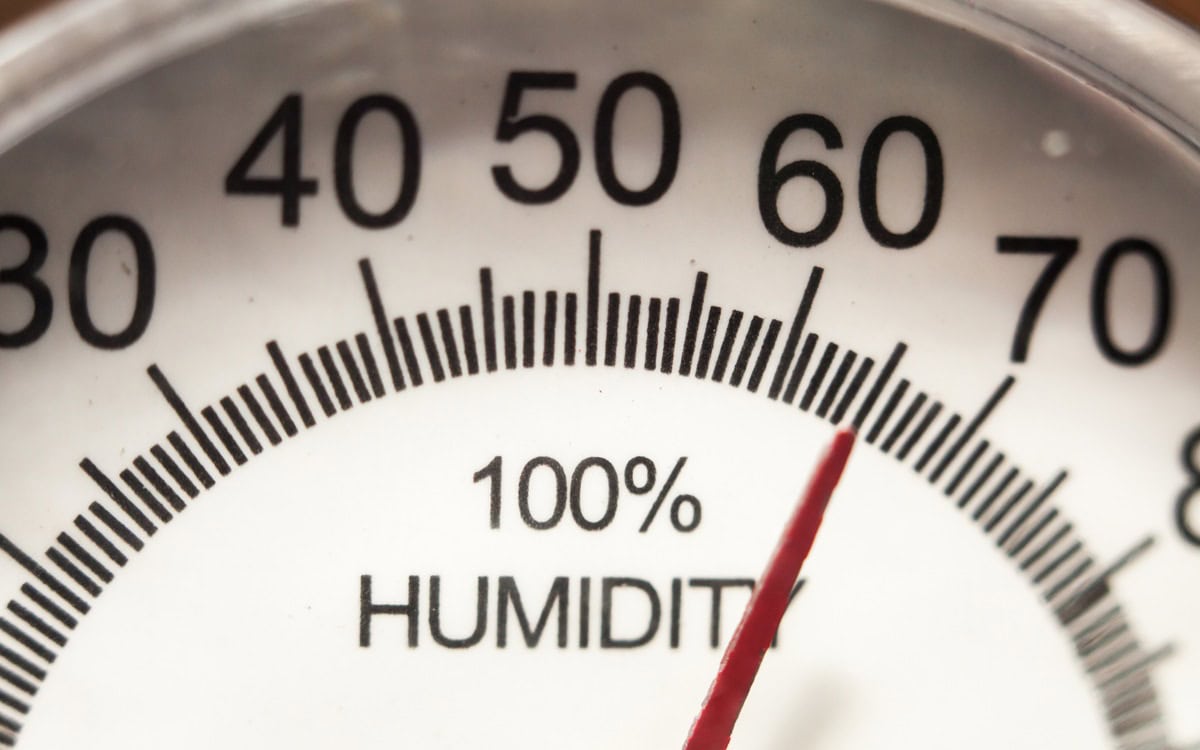
Humidity is the factor that trips up most DIY painters. You can control your thermostat. You can’t always control moisture in the air.
High humidity slows evaporation. Paint needs its solvents to evaporate in order to cure. When the air is already saturated with moisture, those solvents have nowhere to go. Your paint sits there, staying tacky for hours or even days longer than expected.
This extended drying time creates problems beyond inconvenience. Dust settles into the wet surface. Bugs land and get stuck. Every minute that paint stays wet is another opportunity for something to go wrong.
But slow drying isn’t the worst of it. When humidity exceeds 85%, paint may never cure properly. The moisture trapped in the film prevents proper adhesion to the wall surface. Six months later, you’re watching your hard work peel away in sheets.
The target humidity range for painting sits between 40% and 50%. Any higher and you’re gambling. Any lower and paint can dry too fast—creating its own set of problems with adhesion and finish quality.
How Cold Weather Affects Interior Painting
Painting inside during winter comes with unique challenges that catch people off guard.
Your home’s heating system keeps the air warm. That’s good. But it also dries out the air significantly, often dropping indoor humidity to uncomfortable levels. Extremely dry air causes paint to dry too fast, which prevents proper leveling and can leave visible texture in the finish.
Then there’s the issue of wall temperature versus air temperature. Your thermostat might read 68°F, but exterior walls can be 10 to 15 degrees colder during winter months. Paint applied to a cold wall won’t cure the same way as paint applied to a room-temperature surface.
Professionals deal with this by checking actual wall temperatures with infrared thermometers before starting work. They also adjust project schedules, often avoiding exterior walls until midday when those surfaces have had time to warm up.
Another winter challenge involves fresh paint stored in unheated spaces. Paint that freezes—even once—is ruined. The emulsion breaks down permanently, and no amount of stirring will restore it. If your garage drops below freezing overnight, bring those cans inside before your next project.

Sometimes you don’t know conditions were wrong until the paint tells you—usually in the most obvious, frustrating ways.
- Blistering and bubbling happen when moisture gets trapped beneath the paint film. This typically occurs when painting over damp surfaces or when humidity spikes during the drying process. Small blisters often appear within hours of application.
- Cracking and flaking signal adhesion failure. The paint dried too fast, the surface was too cold, or humidity levels prevented proper bonding to the underlying surface. This problem often shows up weeks or months after painting.
- Uneven sheen creates visible differences in how light reflects off the wall. Some areas look glossy while others appear flat. This happens when different sections dry at different rates—usually due to inconsistent temperature or humidity across the room.
- Extended tackiness means the paint is curing slowly due to cool temperatures or high humidity. Paint that stays tacky attracts dust and debris, and it can’t be recoated safely until it’s fully cured.
- Color inconsistencies sometimes trace back to improper conditions. Paint that cures under different environmental conditions can shift slightly in final color—leading to visible differences where walls meet or where you stopped and started.
Preparing Your Space for Painting
Creating the right environment takes planning, but the payoff is worth every minute spent on preparation.
Start by checking your indoor temperature at least 24 hours before you plan to paint. Set your thermostat between 65°F and 75°F and let the space stabilize. Sudden temperature changes during painting cause problems, so consistency matters more than hitting an exact number.
Address humidity next. A simple hygrometer (you can find them for under $15) tells you exactly where your moisture levels sit. If humidity runs high, run a dehumidifier for a day before painting. If it’s too dry, a humidifier or even a pot of water on the stove can add some moisture back.
For rooms with exterior walls, consider timing your project carefully during cold months. Mid-morning through early afternoon gives those walls maximum time to warm up. Avoid starting early in the morning when walls are coldest.
Ventilation helps regulate conditions throughout your project. Open windows if outdoor conditions are favorable—mild temperature, low humidity. When outdoor air isn’t helpful, run ceiling fans or portable fans to keep air circulating without creating direct drafts on wet paint.
Drying Time and Recoat Windows
Most paint cans list drying times based on testing under controlled conditions—usually around 77°F and 50% relative humidity. Your actual results will vary based on your specific environment.
Under good conditions, latex paint typically dries to the touch within one to two hours. Recoat time—when you can safely apply a second coat—runs between two and four hours for most products.
But change those conditions and everything shifts. Drop the temperature to 55°F and drying time can triple. Raise humidity to 70% and you might wait eight hours or more for paint to cure enough for a second coat.
Applying a second coat before the first has properly cured causes problems. The fresh paint can reactivate the partially cured layer beneath it, leading to peeling, cracking, or texture issues. Patience during this phase prevents expensive fixes later.
When conditions aren’t cooperating, resist the urge to speed things up artificially. Pointing a space heater at wet paint creates uneven drying that shows in the final finish. Let the room’s ambient conditions do the work, even if it means extending your project timeline.
What Most Paint Cans Won’t Tell You
Manufacturer recommendations tend toward the conservative end. They print temperature ranges that work for their specific formula under ideal circumstances. Real-world painting rarely happens under ideal circumstances.
What they don’t emphasize is the importance of consistent conditions throughout the entire curing process. Paint that dries at 70°F and 45% humidity, then gets exposed to 90% humidity overnight, can still develop adhesion problems. The first 24 to 48 hours after application represent the critical window.
Manufacturers also assume you’re painting on properly prepared surfaces at room temperature. Cold walls, warm paint, and variable conditions create combinations their lab testing didn’t anticipate. These edge cases explain why some paint jobs fail even when you followed the can’s directions.
The takeaway isn’t to ignore manufacturer guidelines—it’s to understand they represent minimum requirements, not a complete picture. Professional results require attention to factors the label doesn’t mention.
Deciding whether to paint today or wait for better conditions comes down to honest assessment.
- Check your indoor temperature. Is it stable between 50°F and 85°F? Will it stay there for the next 24 to 48 hours?
- Check your humidity. Does it fall between 40% and 50%? Can you control it if not?
- Consider your walls. Are they at room temperature, or are some significantly colder due to weather exposure?
- Evaluate your timeline. Do you have flexibility to extend drying times if conditions aren’t perfect? Can you wait a day or two for better weather?
If any of these factors work against you—and you can’t correct them—waiting makes more sense than pushing forward. A paint job done under the wrong conditions costs more to fix than it would have cost to do right the first time.
When to Call a Professional
Some projects demand professional attention from the start. Large spaces, high ceilings, specialty finishes, and time-sensitive deadlines all benefit from experienced hands who understand how to manage environmental variables.
If you’re facing challenging conditions—extreme temperatures, high humidity, or walls that resist staying at the right temperature—professionals bring equipment and expertise that ensure proper curing regardless of circumstances.
Contractors also carry insurance that covers their work. If conditions cause a failure, they fix it at their cost. DIY failures land entirely in your lap, along with the expense of materials, time, and potentially professional remediation.
Get Your Interior Painting Done Right
Understanding the ideal conditions for interior painting puts you ahead of most homeowners who grab a brush without thinking about temperature or humidity. But knowing the right conditions and creating them are two different challenges.
When your project matters—and when you want walls that look beautiful for years instead of months—working with professionals who monitor and manage these factors makes the difference between frustration and satisfaction.
Ready to take the guesswork out of your next painting project? Contact JK Painting Service Corp at 781-650-7296 today for a consultation. Their team will evaluate your space, explain what your project involves, and help you understand exactly what to expect. No pressure, no surprises—just honest guidance from people who paint homes every day.